Coconut Chutney

Coconut chutney is the staple chutney amongst us Kannadigas. We probably eat a tonne or so of this chutney every year! Well obviously, we are people who have at least one to two coconut trees in the backyard and we make the best use of our resources. Therefore there are not many dishes which does not call for coconut. The recent 'eat-healthy' trend has damped our love for coconut a bit, but mine is coming back with vengeance!! I heart coconut.. Cannola oil lobby 'go to hell'.

Typically this chutney is served at breakfast with Idlis, Dose, Chapati, Rotti and every other bread imaginable. Coconut is cracked open, the flesh grated and then combined with other spices and ground in a huge mortar-pestle we call "Rubbo Gundu" the stone grinder. The resulting goodness is heavenly in texture, perfectly combined, neither too rough, not too smooth, and it does not bleed water. That kind of perfect consistency is not achievable in a blender, mixie. The heat for the motor generally causes the essential oils in the spices and coconut to breakdown and therefore the resulting chutney is way inferior to the stone ground version. But modern convince is something, not many apartments in Bangalore has a stone grinder anyway. 

 
The best chutney I ever had is one the we regularly ate at Kyatsandra, near Tumkur on NH 4. Unlike the regular Darshinis, Idlis here are served with Chutney and Saagu not thechutney-sambar combo. These Idlis there are super soft, and chutney is so heavenly that we will not miss the sambar at all. During my growing up years, Kyatsandra a small town near Tumkur in Karnataka (Now grown into a suburb of Tumkur) is known for the famous Siddaganga Mutt and his holiness Sri Shivakumara Swamy and of course the Idlis... 


We will need,


Green Chillies 10
Curry Leaves 25
Coconut 1/2
Roasted Channa 3 tbsp
Tamarind (size of a chickpea)
Coriander 1/4 cup
Garlic clove 1 small
Salt

Method
  • Heat a heavy skillet. Roast the chillies on the hot dry skillet till blisters appears. Remove and set it aside.
  • Throw curry leaves into the skillet and toast till fragrant about 30 seconds or so. 
  • Combine all the ingredients with little water in a blender / mixie and grind till it resemble coarse.
  • Serve it with hot Idlies, Dose or a bread of your choice.

Aloo Palak

Sometimes, the palate craves for something spicy, something that pops and dance to a Bollywood chart buster.. while the soul craves for something soothing and simple. On a day when you are hard put for time, there are very few options indeed.. This is one such pantry-constrained, time-constrained but not taste-constrained recipes..


Serves 2 ||  Calories per serving  304 Kcl || Protein 9.65 gm ||  fat 21.73 gm || Fiber 4.79 gm

Aloo 1 big (cubed)
Palak 3 cup (chopped )
Chilly powder 1 tespoon
Dhania 1 teaspoon
Amchoor 1 /2 teaspoon
Turmeric a big pinch
Garam masala 1/2 teaspoon
Jeera
Peanut oil  3 tbsp
Salt
Cilantro

Method :
  • Heat oil in a pan. Throw in the jeera. 
  • Once it has stopped spluttering, drop the potatos cover and cook till almost done. 
  • Now stir in the chopped palak along with the spices cover and cook till done. Adjust salt and finish with some cilantro. Serve with a bread of your choice.

Panner Tikka Masala

I love Panner..I keep looking for excuses to make panner! most of time, I need no excuses is another story.This time was actually an important birthday and could not have gone wrong with Panner Tikka Masala. Sunny boy was in good spirits that day and I was able to pull off the show with a relative ease!! This indeed is a time consuming dish and it requires at least an hour and half from start to finish. So I cannot make it as often as I would like to. Sunny boy loves the Tikka Masala curry. If I ask him what he would like to eat, the instant answer (at least right now!!!!) would be 'Tikkamasale'. Though he is not much into the Panner part of it. Well I am not complaining! Hopefully he will acquire a taste for Panner later. This dish has become birthday staple!! To think of it, I had it on my birthday, just that it was from a nearby Indian restaurant. But sadly, the resturant version had so much more cubed onions and capsicum than Panner. I hate any of those vegetables in Tikka Masala. They deserve to be limited to Kadai Panner. Only Kadai Panner!!!!
I was wondering if I should make a double batch of the curry and freeze half for another day. I do not know how good it will turn out. Will update if it turns out to be good. 
Till then, it is just one batch of Tikkamasale...


We will need,

Panner 1lb
Yogurt 2 tbsp
Turmeric a generous pinch
Ginger garlic paste 1/2 tsp
Chilly powder  a generous pinch
Garam Masala a generous pinch
Salt to taste

For the curry

Onion 1  medium
Oil  to deep fry 
Butter 2tbsp
Jeera 1/2 tsp
Ginger paste  1.5 tsp
Garlic paste 1.5 tsp
Chilly powder  1-2 tsp (according  to taste)
Dhania powder 2 tsp
Tomato paste  3 tbsp
Sugar 2 tsp
Kasuri Methi 1/4 cup
Whole milk  1.5 cups
Garam masala a generous pinch
Salt to taste

Method:
  • Slice the Panner block  into 5 equal parts, running lengthwise, so as to increase the surface area for the marinade.
  • Whisk the yogurt and stir in the ginger garlic paste, chilly powder, garam masala, salt and turmeric. Drop the panner slices into the yogurt mixture. Apply the mixture evenly on all the sides of panner. Cover and marinate for 15-20 minutes.
  • For the curry, Heat oil in a wok. Slice onions. Drop the sliced onions into the hot oil and deep fry till brown in colour. Remove and drain on a paper towel. 
  • Melt butter in another thick bottomed wide saucepan. Throw in the Jeera. Once it stop spluttering toss in the onions.  Follow it with the ginger and garlic paste. Cook for a few minutes till the raw smell disappears. Throw in the chilly powder, dhania powder, cook for a few seconds  and add the tomato paste. Stir well. Add 1/2 to 3/4 cup of water to thin it out a bit. Bring it to a gentle boil and then simmer till the fat separate. Remove from heat and allow it to cool.
  • Meantime, turn the broiler on. Arrange the marinated panner on a greased wire rack and place the rack on a drip tray.  Place it in the broiler for about 4-5 minutes, till the Panner is slightly charred on the edges. Keep an eye because there is a big difference between slightly-charred Panner and 'burnt' Panner in terms of taste but not in terms of time!!!
  • Remove and turn the Panner over on to the other side and return it to the broiler for another minute or two. Remove and it warm. If desired, the slabs of Panner can be chopped into cubes.
  • Once the onion mixture is cool enough, transfer it to a blender and pulse it til very smooth. Add a little water if necessary, the thicker the mixture the better though.
  • Pour the ground onion mixture to a saucepan and warm it gently. Once it is simmering, add the milk , Kasuri methi, garam masala, sugar and salt to taste. Simmer till the mixture thickens to the desired consistency. If the curry is too thick, thin it out a bit with some more milk or just water.
  • Once the curry is homogenous as thoroughly cooked, smoother in the panner slab/cubes. Heat for a few minutes till the Panner is warm to touch and serve immediately. We liked it with Chapati and rice.


Peas Pulao

So, the official eating season is in full swing. We are have a good time eating. During such times, I realized that I tend to repeat a few rich-festive recipes very often Malai Kofta , Dum Aloo , and Panner Tikka Masala. Will be updating the last recipe very soon. Along with such curries it will be Jeera rice or of late Peas Pulao. Peas Pulao is not actually a Pulao in technical sense, it is just a mildly spicy but very fragrant rice which goes very well with rice curries mentioned above. If cooking for ourselves I did make it in the Microwave oven!! It takes 12 minutes start to finish that way. Cannot be faster with anything else. Happy eating.

We will need,

Basmati Rice 3/4 C (Use good quality Indian Basmati)
Ghee 2 tsp
Cardamon 3
Black Cardamon 2
Bay  leaf 2
Cloves 4
Cinnamon  1/4"
Marati Moggu 3
Fennel Seeds 1/4 tsp
Green Chilly 2 slit
Fresh Mint a handful
Peas 1/4-1/2 C
Salt to taste

Method:
  • Wash the rice in multiple changes of water. Soak it in two cups of water and set it aside.
  • Heat ghee in a pan. Throw in the cardamon, black cardamon, bay leaf,cloves, cinnamon, marati moggu and fennel seeds.
  • Once the spices stop sizzling, throw in the green chilies and the fresh mint.
  • Throw in the peas. Sprinkle salt and cook the peas for a couple of minutes and remove it from heat.
  • In a Microwave proof bowl, combine the rice, along with the soaking water and the peas and spices.
  • Pop it in the Microwave oven for 6-10 minutes depending on the strength of the oven.
  • Once the rice is cooked, remove from the oven, fluff it up with fork and serve hot.

Sabakki Uppittu

Uppittu...the word conjures up some really strong reactions. Lot of people I know either love or hate Uppittu. I myself can eat a bowl full of Avarekalu Uppittu with the greatest of delights, while abhorring the thought of eating the caked up rawa version, the version served on the great Indian railways as well as in most of north India as 'Upma', come on my cow would not eat it, if I had one, much less my Sunny boy. Amongst the Uppittus I love are the Avarekalu uppittu as mentioned earlier, Shavige uppittu and Sabbakki Uppittu. The last one has always been challenging, either it would not cook through or it would get all mushed up. It was not until recently that I feel comfortable making it and we are loving the results! I am almost making it once every week. The trick is in soaking the Sabakki for about 2 hours in warm water.This is the only way it would work for me. I hate the idea of remembering to soak it the first thing in the morning,given my poor memory these days, but the short cooking time makes up for the long soaking time. It hardly takes any time to cook at all. And it really fills me up. One bowl and I can  actually skip lunch!!!

We will need,

Sabakki 1 cup
Peanuts  1/4 cup
Peanut Oil  1 tbsp (divided)
Mustard seeds 1/4 tsp
Jeera 1/2 tsp
Hing a dash
Turmeric a generous pinch

Green Chillies 3-4 (or more )
Curry leaves
Onion 1 medium
Salt to taste
Lemon juice to taste
Cilatro 1/4 c chopped

Method:
  • Wash the Sabakki in multiple changes of water and drain well. Soak the drained Sabakki in warm water for at least two hours. The Sabakki is ready when the center is not hard and the Sabakki is completely squishy. Once ready transfer it a colander and washing it under running water to remove all the excess starch. Drain and set it aside.
  • Heat a Kadai on medium flame. Toss the peanuts. Toast till the peanuts are fragrant. Remove from heat and crush it into a coarse meal. Set it aside.
  • Heat about 2 tsp of oil in a Wok. Throw in the mustard and jeera. Once it splutters, throw in the hing,turmeric, green chillies and curry leaves in quick succession. 
  • Once the sizzling stops, add the onions. Cook till the onions turn golden brown.
  • Now toss in the sabakki. Keep stirring the Sabakki to make sure that bottom is not burning.
  • Throw in the toasted peanuts and drizzle the remaining oil.
  • Once the sabbakki turns slightly translucent, adjust the salt and lemon juice and throw in the cilantro. Stir well and serve it hot.

Rajma

How would a South Indian palate react to a very buttery-but-no-kick-even-after-a-mile preparation of a 'royal-urad' dal?? Well, just not very cordially. My first introduction to 'Raj' the royal 'mah' or urad dal was not all that friendly. Our erstwhile landlady in Amritsar had sent us this rich dish of plump kidney beans drowned in a combination of tomatoes, onions and butter. The beans I felt was such a hardy guy that the simple combination of tomatoes and onions did nothing but torture my palate. Rajma would definitely hold up to something stronger in the background I imagined. But I never liked the beans enough to explore other ways of preparing it. What started on a sour note ended up absolutely rancid during my hostel days! Folks at Sabarmati hostel in JNU had an uncanny knack to prepare an inedible version of Rajma and Kichidi. I am yet to recover from the 'Kichidi-treatment' but 'Rajma-treatment' I guess I have gotten over.
So what is the secret? The secret is Rasam powder. I know traditionalist would scoff-faint at the idea but well Honey sure liked it and that makes me confident that most 'south'ish palate would readily accept this version of Rajma better. What is more, this recipe is onion-garlic free! Yet so very tasty.

We will need,

Peanut oil/Butter  2tbsp 
Mustard seeds 1/8 tsp
Jeera 1/4 tsp
Hing a dash
Green Chillies  4  slit(adjust according to taste)
Turmeric a generous pinch

Tomato Puree  2 Cups
Rajma  2 Cups cooked
Jaggery 1 tbsp (Shhh!!! this is a secret!!)
Rasam Powder 2 tsp (adjust according to taste)
Salt to taste
Heavy Cream to garnish (optional)

Method:
  • Heat peanut oil /butter in a thick bottom pot. Throw in the mustard and the Jeera. Once they stop spluttering add the slit green chillies, hing and turmeric.
  • Follow immediately with the tomato puree. Stir and cook the mixture for a few minutes.
  • Add the rajma, and all other ingredients except cream. Add about a cup of water (left over cooking liquid) and simmer for about 10-15 minutes. If the mixture appears too thick add some more water to bring the curry to the desired consistency.
  • Adjust salt, remove from heat.  Garnish with cream if intended. Serve hot with warm Phulkas or rice.
If using canned beans, be sure to drain the beans and rinse it well under running tap water. For some reason, the beans straight out of can smells funky. If cooking rajma from scratch, pick and clean the beans and soak it in plenty of water overnight. Pressure cook it with some chopped ginger.Drain and reserve the cooking liquid. Use the cooking liquid in the curry. I generally cook an entire kilo / 2 lbs of beans and freeze it in big zip lock pouches. It will last me for at least 4-5 meals. I like these better than the canned version while enjoying the convenience of not having to plan ahead - soak -cook. 

Badam Halwa

Wow! It is already November..Sunny boy turned two years old today..The entire previous month went into birthday party planning, Deepawali..It was a busy few weeks indeed. Now here we are Sunny boy graduates to a toddler from a baby. It is rather sad that he is no longer a baby. I just loved his smell after nursing, may be even after the clumsy burping and also all the spit ups..I loved to see him smile at me, those shy, hesitant smiles and the aaas...ooos and all the cooing..How I miss those babyhood days. Now he is old enough to tell me what he wants me to make for his lunch. The common refrain right now is "Nooooo,Nooop, NooooQQQ" It is rather funny how your sweet helpless baby who needs you for everything grows in independent spirited-I-know-my-mind type toddler. It is probably one of the very few instances which makes you both sad and proud at once.

Now for the Badam Halwa. I had to make something ultimately decadent for this occasion. Sunny boy loves only creamy light desserts. He refused to taste my Kajjaya this Deepawali :( So,I was thinking and thinking and zeroed in on Badam Halwa. It is rich, creamy and luxurious.... Verdict, Sunny boy had two scant bites...Not so great a verdict, hopefully, he should appreciate the dessert better later this evening.


We will need,

Almonds 1 cup
Sugar 1 to 1.5 cups (or even more if you like it sweeter)
Ghee 4 tbsps
Saffron 1/4 tsp (yes! that is more than generous)
Whole Milk 1/4 cup

Method:
  • Soak the almonds in warm water for a few hours ( I do it overnight). Drain and de-skin it.
  • Combine the almonds and the milk in a blender and pulse till the mixture is almost smooth but still has some texture to it. Remove and set it aside.
  • In a wide non-stick pan, combine 2 tbsps of ghee, sugar and the almond mixture and bring the mixture to a gentle boil.
  • Reduce heat and keep stirring constantly lest the mixture burns. Throw in crushed saffron and cook till the mixture leaves the side of pan and thicken slightly.
  • Finish it with the remaining ghee and remove from heat. Serve warm or at room temperature.


Goes to Sravani's festive foods

Haal Paak

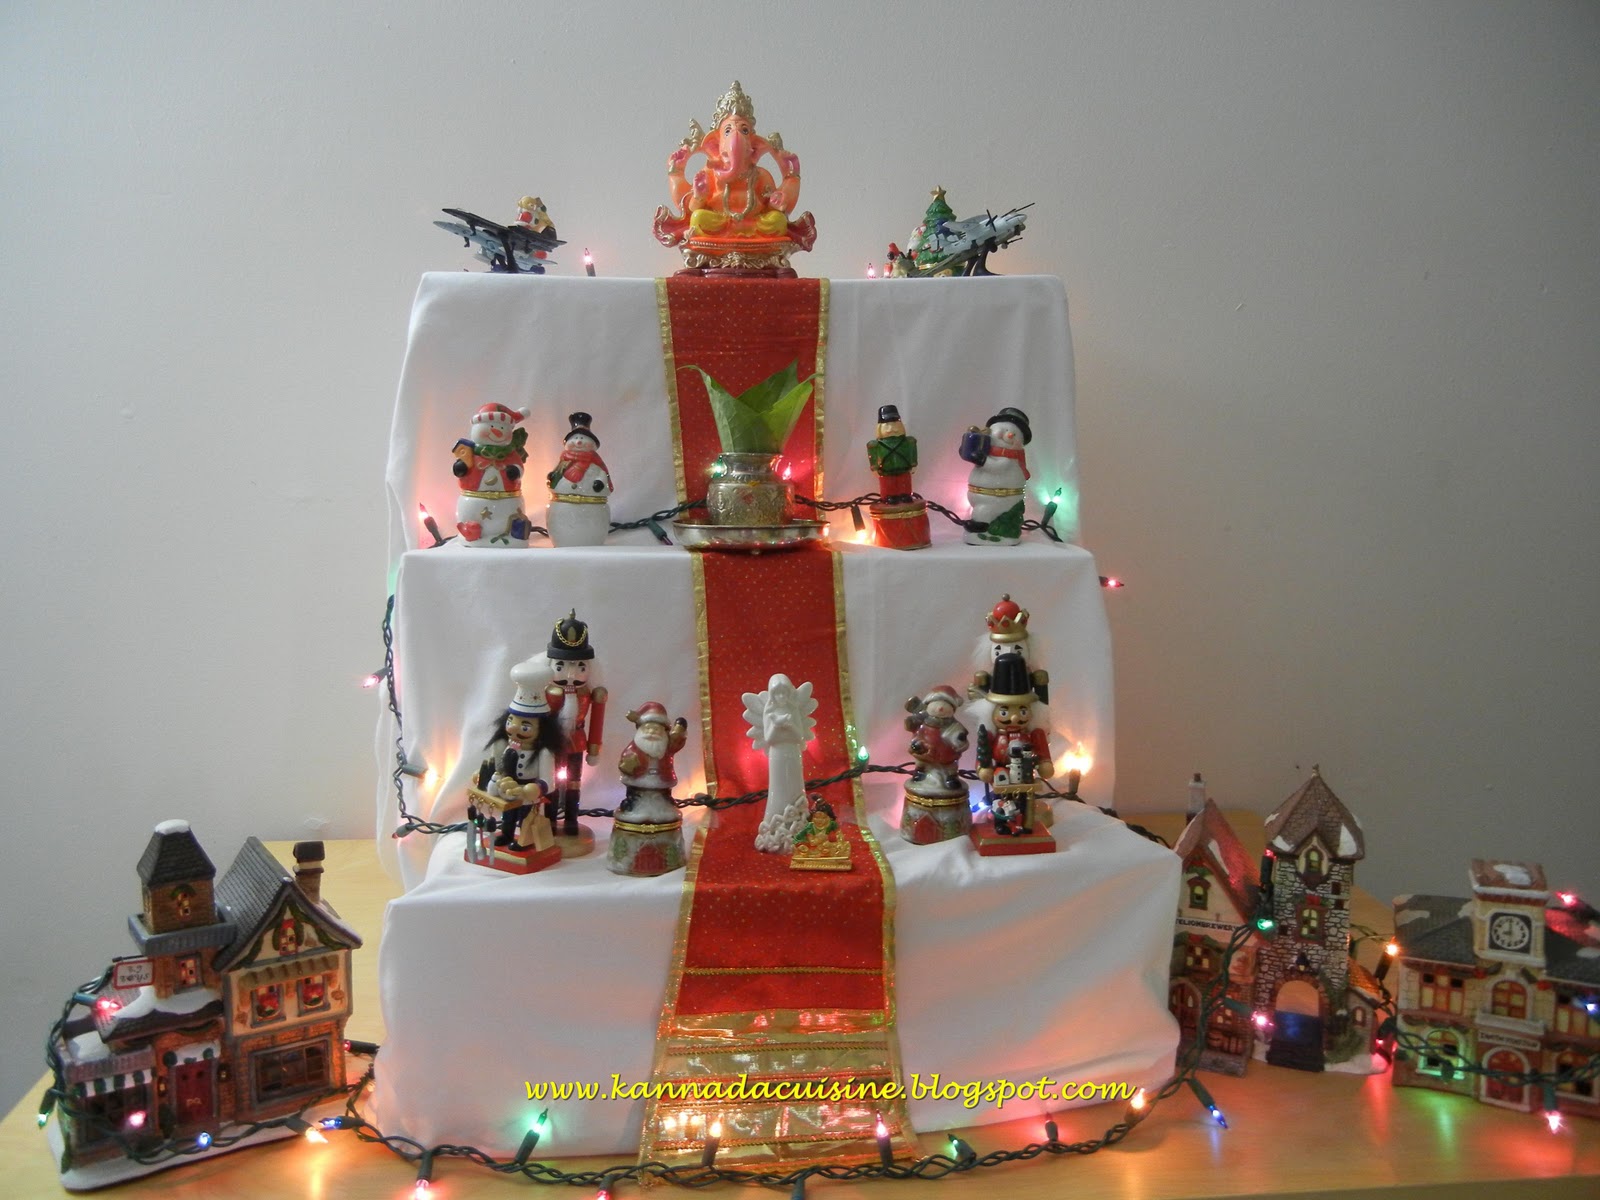
It is my favorite part of the year. The festival season. Dasara is here and soon it will be Diwali and new year.As usual it is the time when the Doll collection sees the light of the year. This time it is special because my Sunny boy is old enough to  understand what it is all about. I do not have the 'Pattada Bombe' which  usually presides over the celebrations, hope to get one for the next season. I miss the collection I have back home in India, Dashavathara, wedding ceremony, the traditional music band, temple, assorted animals, so many pieces all wrapped up and secured in the attic! The ones that I have now are just a few pieces from the holiday collection. I look forward to the day when I will have a grand 'Bombe habbba' displaying all the pieces I have collected through the years. For now it is the tiny version.


It has been a  crazy past few weeks.Sunny boy managed to rip open the space bar of my laptop. So blogging is a very laborious process now. I only hope all these figurines will retain their heads and hands till Vijaydashami.

'Bombe Habba' ,means feasting because we need to make something to offer the gods as 'Neivaidya'. Today's offering  Haal Pak.  It is a very delicious fudge and my version is pretty easy. Here we go.


We will need,

Evaporated milk 1 can (354 ml)
Sugar  1.5 cups
Butter 2 tbsp

Method:
  • Grease a plate with some butter and set it aside.
  • In a non stick pan, combine the sugar with a few tbsp of water and bring it to a gentle simmer.
  • Stir n the butter and the evaporated milk. Stir  well to combine.
  • Cook the mixture on a gentle heat till it leaves the side of the pan.Keep stirring often making sure that the mixture is not sticking to the bottom.
  • Once it starts leaving the sides of the pan,stir vigorously and pour it onto the greased plate. Smooth out the top using a spatula if you like. I like mine rustic. 
  • Cut into squares once it is slightly cool. Makes 10-12 pieces.
Happy Dasara or as we say it  in Kannada 'Dasara Habbada Shubhashayagalu'....


Ragi Sari for a toddler

Ragi porridge for baby is a preferred food back home. Starting with the blander version and continuing it with a picky toddler can be hard. So I had to tweak the original recipe to make it more flavorful and nutritious. So here I am experimenting with a lot of ingredients to check what my little one likes. Finally this is what he liked!  Sure they grow up very fast. 

We will need,

Whole Ragi  3/4 cup
Cardamon 2 pods
Saffron a generous pinch
Almonds  10-13 lightly toasted

Method:
  • Pick and clean Ragi for gravel and dirt. Wash it in several changes of water. Drain well and dry it indoor till no trace of moisture remains.
  • Heat a thick bottom skillet. Throw in the Ragi, reduce the heat to medium-low. Keep stirring till the ragi is fragrant, about 15-20 minutes. Remove from heat. Throw in the saffron and cardamon. Spread it out on a plate to cool down.
  • Once cool enough to handle, grind it into a powder in a coffee grinder. 
  • Remove and store it in a glass jar. It stays good for at least 3 weeks.
  • Grind the almonds separately and store it in another glass jar. ( Vary of plastic after the BPA mess)
Prepare the Sari like you would the regular variety. Stir in ground almonds while the Sari is still warm.

Sabakki Payasa Short cut

Festival season in full swing and here comes Sabakki payasa. As kids me and my sister called this one "gulle gulle payasa" aka 'bubble bubble' payasa, and the name has struck to it. Pearly bubbly milky delight it is still my sister's favorite dessert. To me it always reminds me of 'Pythons'.... well the story goes something like this. Mom was making this payasa one day probably the year was 1991. As usual I was lying on the couch probably reading or watching TV. Mom wanted me to help her, one of the very few days that she needed me to do something. But I did not move, I was there lying like a lazy Python. She got angry and called me just that, 'you lazy Python, come here and help me'. For some reason, I got very offended. Now that I look back what was it about? Just a Python! But back then I was very upset, 'Python' I hate snakes. I said I have nothing to do with anybody for the rest of the day. I went and shut myself up in my room. Later, at dinner time, my mom cajoled me to come and have some 'gulle gulle payasa'. Barely awake, I said ' Pythons do not eat gulle gulle payasa' and I did not eat it. I fell back asleep. Later the next day, I realized I had not had my 'gulle gulle payasa' but nothing remained it of, not even a trace. Probably that taught me well and I never skip my meals or for that matter, I just eat when ever I have a chance!

Like any other Payasa, the regular version means reducing milk till it becomes creamy and rich. But this time around, I did not have the time to stand at the stove and stir..stir and stir. I had to get it done fast, so I took the help of my pantry friend Nestle S A....It worked out fine. Though it is just not the same when I stand at the stove and stir the milk to make a creamy payasa. Like, I never had back ache later, and the payasa still managed to disappear with immediate effect!

We will need,

Sabudana/ Sabakki  1/2 cup
Whole milk  1 cup
Sweetened condensed milk  5 oz
Evaporated Milk 5 oz
Saffron a pinch
Cardamon ground a pinch
Raisins 1/4 cup
Ghee 1 tbsp

Method:
  • Wash the Sabbakki in several changes of water. Soak in water just enough to cover it for about 1 hour sometimes longer. When it is ready it should not be tough in the center when we bite it. Drain it throughly.
  • Soak the saffron in a tbsp of warm milk. Set it aside.
  • In a thick bottom pot, I use a non-stick pot, combine the Sabakki with 3/4 cup of water. Put the pot on medium-low heat. Cook till the Sabakki is almost translucent but not fully cooked. 
  • Now stir in the rest of the milk and cook till the Sabakki is completely cooked. Reduce heat to low and simmer till it thickens about 5 minutes.
  • Stir in the evaporated milk, saffron, cardamon and the condensed milk. Cook till it is well blended and coats the back of the spoon. remove from heat.
  • Heat ghee in a pan. Once hot, throw in the raisins. Saute the raisins till they plump up. Remove from heat. 
  • Pour the ghee and the raisins on the Payasa. Serve hot/ cold/ room temperature.

Holige Saaru

I cannot believe the Sravana month is almost coming to an end! It feels like last week that we celebrated Ugadi..So official Hindu festival season has started. We have already had two sweets - Sabakki Payasa and Kesari Bhaath in as many weeks, one for Varamahalaxmi and then Krishnajanmastami, more to come in the next few weeks. After Honey went sugar free, I make sweets with a lot of guilt. I do try and make very small quantities just good enough for the Neivedya and probably one small serving for each of us. Even then it is a lot of sweets! Lo behold, Ganesha comes next week. Ganesh Gowri means Holige again. Here is Holige Saaru my Mom's version.  This is what we do with the stock after making Holige. 
Often the water used to clean up the grinder/ mixer used to grind the dal-jaggery mixture is also used with the dal stock to make this curry. After all we are a culture that treats wasting food as criminal offense! 


We will need,
Dal stock from making Holige (or cooked dal +water) 4 cups
Tili Saaru Pudi   2tbsp
Coconut fresh 3/4 cup grated
Ghee  3 tbsp
Mustard seeds 1/4 tsp
Hing a generous dash
Curry leaves a generous handful
Whole red chillies dried  3-4
Coriander fresh a handful
Hurana/ the dal stuffing for Holige 1/4 cup (substitution is jaggery)
Tamarind extract 1 tbsp
Salt to taste

Method:
  • Combine the tamarind, saaru pudi and a little stock in a thick bottom pot and bring it to a boil. Simmer and cook till the mixture smells fragrant. Add more stock if the mixture reduces rapidly. The idea here is to mellow the spices and tamarind to the right consistency.
  • After about 20 minutes or so, add the remaining stock, the Hurana, coconut and salt. 
  • Prepare the oggarane. Heat ghee in a ladle, throw in the mustard, hing, curry leaves and red chillies. Once the sizzling stops, pour the mixture right onto the Saaru. I generally immerse the ladle into the dal so that the fumes perfumes the curry, just the way mom does.
  • Finish with the coriander.. Serve with Holige, rice and ghee...
P.S: Mom eats her Holige with a generous topping of this Saaru.. I do not :)

Happy Janmashtami

Happy Janmashtami ....Here is my little Krishna, after a meal of Gojjavalakki, Kosambari and Kesari Bhaath...


Summer Squash Chutney

Continuing with the season's best.. Summer Squash


We will need,

Summer Squash  1 lb cleaned and chopped into chunks
Garlic  2-3 cloves
Chillies (red/ green) 4-5 (adjust according to taste)
Cumin seeds 1/2 tsp
Tamarind - size of two peas
Coriander a generous handful (optional)
Black pepper  1/4 tsp
Peanut oil  3 tbsp
Mustard seeds a generous pinch
Salt to taste

Method:
  • Heat oil in a Kadai. Throw in the mustard seeds, cumin followed by the chillies.
  • Once the chillies stop sizzling add the squash, pepper,tamarind and garlic.
  • Saute till the squash is tender and garlic is mellow. Remove from fire, let it cool.
  • Once cool, combine the rest of the ingredients and pulse in a food processor to desired consistency. I like my chutney a little chunky! Serve with hot rice and ghee.