Talipattu

 Talipattu is a very filling breakfast. I remember asking mom to make this for me on days when I did foresee no time to break for lunch. These Talippattu kept me full and used to see me through the day! It is hardy and very nutritious.
By the way my old faithful camera died. ...and this picture was shot on my handycam and I am not too happy with the results. But till the new camera is here this is what I can offer :(


Water  1.5 Cups
Whole grain flours 1 Cup (Think a mixture of Ragi, Rice, Bajra, Millet)
Whole Wheat flour  1/2 Cup
Oil
Spinach/ Dill/ Fenegreek/Coriander 1/2 C
Onion                                        1 medium
Green Chillies                     4-5
Cumin                               1 tsp
Salt to taste
Method:
  • Heat water in a thick bottomed pot. Throw in the salt. 
  • Mince onions, greens and green chillies. Set it aside
  • Once the water comes to a boil, add the whole grain flours. mix and cook covered for about 2-3 minutes. Remove from heat.
  • Once the mixture is cool enough to handle, stir in the minced onions, greens, green chillies, cumin, whole wheat flour and kneed into a soft dough. Rest the dough for a 10-15 minutes.
  • Preheat a skillet.
  • Pinch lemon sized balls out of dough and roll it between your palms. Place it on a piece of parchment paper or a greased plastic sheet and flatten it with the palm of your hand. Using your finger tips, roll the dough out into flat circular discs the thickness of say rotis. 
  • Transfer the discs to the skillet. brush it with some oil on top. Cook till the Talippatu changes colour and flip. Cook on the other side till golden brown specks appear.
  • Serve it hot brushed with some ghee. Yogurt and pickles goes very well with these Talipattu.
Tips: I generally use a mixture of Bajra /Sajje, Millet/ Navane, Ragi, Rice flours for the whole grain part. The original Talippattu calls for just these and contains no wheat flour. But without the gluten in the wheat it is rather difficult to roll out the Talippattu. If you prefer gluten free Talippattu just substitute the wheat flour for a flour of choice.
Also mincing the onions, greens and chillies is important. The finer they are the thinner the Talipattu will be. I process mine for a few seconds in the food processor. It gives excellent results.

Haal Holige/ Haal Obbattu/ Whole Wheat flatbread with coconut sauce

We Kannadigas make a variety of Holiges...This is one of the rustic types. MIL made it when she was here and this has been in my drafts for a long time. Looks like it is time to post it :)

Unlike other Holiges this one does not have a filling but comes with a rich sauce.

We will need,

For the Pooris,

Whole wheat flour ( like Ashirwad )    2 Cups
Salt a pinch
Peanut Oil to deep fry.

For the Kaihalu the sweet sauce,
Coconut grated          2 cups
Coconut dry /Kobbari/ Kopra 1/2 Cup
Jaggery                      1 to 1.5 Cups (or more depending on taste)
Poppy seeds              3 Tbsp
Cardamon                 3

Method:
  • Mix the whole wheat flour, salt with some water and kneed it into a tight dough.
  • Pinch lime sized balls of dough. Roll it into thin flat discs and let it air dry for about 10-15 minutes.Roll out most of the dough and let it air dry and start deep frying the first rolled out disc first and so on; that way most of it will be air dried and ready to be deep fried.
  • Heat oil in a deep fryer/ Kadai. 
  • Slip the disc into the hot oil one at a time and fry till golden brown. These Pooris will not puff up and will be crispy. Drain and stack the pooris in an air tight box. This way they can be stored for a week. 
  • For the Kaihalu, Toast the poppy seeds on a warm skillet and crush it using the mortar pestle. 
  • Open the cardamon pod and scoop the seeds within. Crush them using the mortar pestle.
  • Combine the coconut, kopra, the crushed poppy seeds and cardamon seeds in a blender with some water and grind it into a smooth paste. 
  • Remove the mixture to a thick bottomed pot, add coarsely crushed Jaggery and  about 3-4 cups of water. 
  • Bring the mixture to a boil and simmer till it is reduced and thicker. Remove from fire. This sauce too can be made ahead and stored in the fridge for about 4-5 days.
  • To assemble the holige, dip the Pooris in the kaihalu for about 20 seconds and pile it on the serving plate. Spoon a little sauce on top. This yields slightly crispy Holiges. i loves these. If you prefer softer ones, Let the Pooris soak in the sauce for 30 minutes or longer. The longer it sits the more mushy it will be. It can be served warm, or chilled in the refrigerator.

Kadalebele Payasa/ Chickpea Pudding

Payasa is an ultimate comfort dessert. I know I did die for a good Cheesecake or say Chocolate Eclair but they satisfy just my sweet tooth, not my soul. I guess it is more to do with what we eat when we are young - the degree of familiarity.The aroma, textures that are familiar, makes me feel that they know the right spot to light up in my soul. We Kannadigas are notorious for serving Payasa for all occassions, weddings, child birth, postpartum..and not to mention funerals and this has done a great deal to increase my affinity with these decadent delicacies.

When my mother was here helping me with my new born, she fed me umpteen number of Payasa, almost one everyday. The lore has it that, as much as a new mother, that too a breast feeding one eats sweet like Payasa the sweeter her milk will be and happier the baby will be!! My guess is more to do with the calorie part of it. Most Payasas are rich and that will go a long way to take care of the nutritional requirement of a new mother and her baby. What ever it was, this is something mom made almost a year back and I have been pretty lazy to write about. Now is the time I guess.


We will need,

Chickpeas Split /Channa dal   1/2 Cup
Jaggery                                   1/2 Cup
Fresh grated Coconut             1/2 Cup
Ghee                                       2-3 Tbsp
Raisin                                      2 tbsp or more
Cashew                                  a handful
Saffron                                  a few strands (optional -I love it)
Cardamon                              2 pods

Method:
  1. Pick and clean the Channa dal. Wash it with several changes of water. Soak it for at least 2 hours.
  2. Cover it with fresh water and cook it is soft. Set it aside.
  3. Meanwhile, grind the coconut and Jaggery into a smooth paste with a little water. The paste should be as smooth as sandal paste (Mom says!! )
  4. Crack open the cardamon and pound the seeds into a fine powder. And combine it with the coconut paste.
  5. Soak the saffron in a tablespoon of warm water or milk. Set it aside.
  6. Heat about 1 tbsp of ghee, throw in the cashew pieces, toast it till golden and remove it from heat. Repeat it for raisins using the remaining ghee.
  7. Fold in the coconut mixture into the cooked dal and bring it to a boil. Reduce heat and simmer.
  8. If using saffron, add it to the dal mixture.
  9. Finish it with the toasted cashews and raisins. Pour in the ghee the was used to toast the cashews and raisins. Serve hot/cold or at room temperature. I usually have it in all forms!!
P.S: If you prefer your Payasa to be thick like 'eating' consistency, add about 3/4 cup of water while cooking the dal. If the dal remains uncooked and becomes dry add a  little more hot warm 1/4 cup at a time. If you like your Payasa at 'drinking' consistency the way I do, be generous with water right at the beginning. Control the amount of water to alter its consistency.

Ice Cream Indian style

I love Ice Creams. I know this is not the time of the year for ice creams, but then for a person like me when is it not the right time to have one!! The single biggest craving  when I was expecting my son was Ice Cream and pity here in north America Ice Cream has a different meaning all together and is made with egg yolks... I never liked Hagen Daaz, but i never knew of the yolks in them till pregnancy made my olfactory senses more acute and told me about the yolks even before the list of ingredients did.

I kept searching for good home made ice cream recipe till i ate one at my co-sister's place. Her mother served us the most delectable home made ice cream ever. I fell in love with it immediately. She obliged my request for her recipe with a sample supply of ingredients. How gracious was that one, lucky me! Thanks to her. We now have a perpetual supply of home made ice cream in all different flavors- strawberry, pineapple, pomegranate...the list is endless. Just like me, tweaked her basic recipe with my fresh fruit pulp and honey :) Not only is this recipe vegetarian but it is also low in fat compared to the commercial variety. In fact for this reason it can be technically called a frozen dessert in USA and not ice cream!! Cannot believe it :)

 Here is the basic recipe courtesy Hema Aunty.Yes it is the heavenly pumpkin cheesecake peeking at the corner of this photograph.

We will need,

Milk   1/2 Liter
GMS   (Glycerol Mono Stearate)  1.5 tbsp
Cornflour           1.5 tbsp
Sodium Alginate  (look for food grade) 1/8 tsp
Sugar 10-12 tbsp
Cream 75 ml
Fresh fruit pulp  1/2 cup (Think strawberry puree, crushed pineapple, pomegranate molasses, Raspberry, blueberry, mixed berry puree, mango puree)
Honey  2 tbsp
Essence and food color if preferred. ( I do not use synthetic food colors though)

Method:
Stage 1:
  • Mix the G M S powder, Cornflour and Alginate in little milk and set it aside. 
  • Bring the rest of the milk to a boil. Dissolve sugar in it. 
  • Stir in the cornflour mixture. Simmer for a few seconds and turn off the heat. 
  • Cool completely making sure that no cream films the milk mixture. Stir it once every 3- minutes or so till completely cool.
  • Pour the mixture into tall 2 quart container ( at least 1.5 liters) and freeze it.
 Stage 2:
  • Once the mixture is completely set, remover and cut it into big chunks. Pour in the cream, honey and run it under a hand mixer. Once the mixture has at least doubled in volume pour in the fruit pulp and whisk it with the hand mixer till the volume is at least tripled.
  • Freeze the mixture till firm. 
  • Scoop and serve as desired.
  • P.S: In the picture are strawberry and pineapple: with pick-your-own strawberry puree that is lying in my freeze and the other with drained crushed pineapple out of the can. If you prefer brighter colors, add a few drops of food coloring. Essence and extracts also can be used if preferred.

Jam Cookies

Yay yay yay....it is that time of the year again, when I do not feel guilty eating goodies. Before the resolution comes into effect I go into binge-eating. It is a different issue that my resolutions weaken by the third week of January and fail by the end of February.
At this time of the year it is all about baking. The nip in the air always turn my oven on!!  There is something about fall that makes the aroma of fresh baked cookies, cakes and bread beyond irresistible.
Here is a batch of jam cookies. I tweaked my mother's basic biscuit recipe a bit to end up with these. The actual recipe calls for Dalda or Shortening. I am against shortening and the likes. I like to keep food as natural as possible without becoming fanatically against dairy...nuts...wheat and you name it.. (I can never imagine a 'Vegan me'....cannot live without Yogurt and Ghee and of course Panner, everything else can go to heaven)

This basic biscuit recipe is very versatile. Just use the choice of custard powder, essence and food colour (again not my choice) to end up with your favorite flavor. One look at the Bakery shelves back home, we will stumble upon green-pista cookies, pink-strawberry cookies, pale yellow vanilla cookies etc. These are just so versatile.. I did not have strawberry custard and I am against synthetic food colors so I jazzed these cookies with some home made Strawberry preserve (made from pick-your-own Strawberries this summer). These  came out perfect.


We will need,

Butter  125 gms  (room temperature)
Sugar 125 gms
Milk     60 ml
Vanilla  1/2tsp
Flour   185 gms
Baking Powder  2 tsp
Custard Powder   50 gm
Salt a pinch
Strawberry preserve   about 1 tbsp or there about (instead use a preserve of your choice)

Method:
  • Pre-heat the oven to 350 F.
  • Cream butter till soft. Add the sugar and cream till the sugar is completely dissolved.
  • Pour in the milk and the vanilla essence/ extract and mix thoroughly.
  • Sift the flour with Custard powder and Baking powder a few times to combine it well.  Stir in the salt. 
  • Now gently mix in the flour mixture into the butter mixture. Mix it till just combined. Over mixed dough yields tough biscuits. So be gentle with the dough.
  • Pinch small balls the size of limes. Roll it between your palm. Press it slightly with your thumb to make an indentation. Repeat with the rest of the dough. 
  • Using a teaspoon drop the preserve into the indentation.
  • Pop it into oven for about 15-20 minute, till they are golden.
  • Cool it on wire racks and store it in air tight boxes. They last for at least a week.

Vegetable Masale Gojju

MIL makes this wonderful curry to go along with anything from Dosa to Chapati and everything in between!! We love it. It is rich and spicy and can satisfy any palate craving something savory.

We will need,

Mixed vegetables     2 cups
Coconut grated         1/3 to 1/2 cup
 Oil                              4 tbsp
Mustard seeds             1/4 tsp
Jeera                           1/2 tspSalt to taste
Lemon juice to taste

Grind to paste: 
Onion                        1 small ( chopped and toasted )
Garlic                        3 cloves (optional)
Ginger                        1/2" piece
Coconut grated          1/4 cup
Cinnamon                  1" piece
Clove                         5-6
Poppy Seeds              1 tsp (toasted and coarsely pound)
Green Chillies             5-6 or according to taste
Coriander                   a small bunch
Mint                           about a handful
 
Method:
  • Heat oil in a thick bottomed pot. Throw in the mustard and Jeera. Once they stop spluttering pour in the masala paste. Bring it to a boil.
  • Throw in the vegetables. Cover and cook till the vegetables are tender- crisp. 
  • Adjust salt. Squeeze the juice of half a lemon and serve hot with Rice/Roti/Dosa

Tomato Palya

MIL is not just a sweet person but also a super cook. I have always wondered how her signature dishes taste consistently awesome every time she makes them, anytime, anywhere! Me..I get lost if I do not find my measuring cups and spoons :)
This time around I measured all the ingredients so as to never go wrong.
Honey adores Tomato Palya. I like it too. It goes very well with Chapatis and a dollop of ghee. 


We will need,
Tomatoes (Plum or the Jamoon variety )    3 large
Onion                                                        2 large
Oil                                                            4 tbsp
Green Chillies                                            4-5
Channa Dal                                                1 tsp
Urad Dal                                                    1 tsp
Curry leaves                                               a handful
Sugar                                                         1 tsp
Huli Pudi / Sambar Powder                        2 tsp
Mustard Seeds                                           1/4  tsp
Cumin                                                        1/4 tsp
Hing                 a dash
Salt  to taste

Method:
  • Dice tomatoes and onions roughly. Slit the green chillies.
  • Heat oil a Wok. Throw in the mustard seeds, cumin and the hing. Once they splutter, add the channa dal and urad dal. Saute for a couple of minutes.
  • Now add the curry leaves and green chillies. Stir for a minute and add the onions. 
  • Once the onions are translucent, about 5-8 minutes add the tomatoes with their juice.  Toss in a pinch of salt. Cook covered for 5-10 minutes.
  • Now add the Huli Pudi and sugar and mix well. 
  • Cover and cook till the tomatoes are soft. Most often than not tomatoes are juicy and does not need additional water to cook but if the mixture becomes dry before the tomatoes are done add half a cup of water.
  • Once the tomatoes are done, adjust salt and serve hot with fresh chapatis.

Ragi Dose

After a long vacation in India, cooking seems like a  very distant proposition! Food and family goes together and no wonder they say, a family that eats together, stays together. Back home it was all about endless dinner-lunch-breakfast invitations. Me and Honey had prepared a chart of all the eateries and restaurants we would visit when in Bangalore, alas, we did not have enough time for all the dinner-lunch-breakfast invitation that we did go to a favorite restaurant to eat. With all the running around we managed to eat at Inchara in J.P.Nagar, S.L.V, Sathayanarayana tiffin (near actor Ambarish's house in J.P.Nagar, Veena Stores and Nandini.

After all the wonderful food and the warm sunlit days, we are back to our normal routine. But the good news is the holidays are just round the corner and I am already humming the holiday tunes...Yeh yeah...Santa is already in town. I got to get down to baking! Got some pumpkin and cheese will see how my cheesecake turns out to be. Till then it is just some Ragi Dosa


We will need,

Urad Dal    1 cup
Ragi Flour   2.5 cups
Fenugreek Seeds 2 tsp

Koshar Salt to Taste
Ghee to cook the Dosa.

Method:
  • Soak the Urad Dal and fenugreek seeds for at least four hours. Then Grind it into a smooth batter.
  • Stir in the Ragi flour and salt. Set it in a warm place to ferment overnight. Sometimes fermentation requires about 13-15 hours, as it does in the New England region during the Winters. Just that with fermentation the volume of the batter should increase.
  • At this point the batter stores well in the refrigerator for a week. 
  • To prepare Dosa, preheat a skillet. Pour a ladle full of batter right at the center of the skillet and spread it in a circular action starting from the center, fanning out to the edge of the skillet. 
  • Dab some ghee /butter/ oil on the dosa and cover it with a lid for about 3-5 minutes.
  • Once the Dosa is cooked it comes off the skillet pretty easily. Serve hot with some coconut chutney.

Happy Deepawali

It was Dasara just yesterday and it is already time to make Kajjayas! I am not complaining..Love the festival season.
Let the festive season bring a lot of joy and prosperity to each one of you and your families! Happy Deepawali.


Here is a peek at our Deepavali celebration..

Mavinahaaina goojju / Mango curry

My sister is married to a wonderful man from Coorg. Coorg is known for its coffee estate and of course fabulous non-vegetarian food. This recipe is courtesy bro-in-law. This recipe calls for both raw mango and sweet ripe mango. Initially I was hesitant to try the mixture, more so, because it also called for shrimp! But lo behold, the curry was exceptional. This one makes it to my bucket list. Ah...it is a treat to the senses and I strongly urge all the skeptics to give it just one shot to get hooked.
I made a vegetarian version and added shrimp to a separate small portion of the curry. I am sure Panner/ Tofu/ Broccoli makes a good addition to the vegetarian version. The curry is just fabulous without any vegetables or protein.
Honey's verdict....ummm...ah......yummm...


We will need,

Shrimp/Tofu/ Panner   1/2 lb
Green chillies               2 slit
Coriander fresh            a handful
Oil                               3 tbsp
Mustard seeds             1/4 tsp
Curry leaves                 a handful
Pearl Onions                4-5 (optional)
Sweet ripe Mango       1 big (I should yield a little over one cup of mango pulp, extracted without any addition of water)

For the masala paste:
Tart Raw mango         1 medium cut into pieces
Dry red chillies            4 Byadigi chilles (for the colour)
Dry red chillies            2 Guntur (hot version)
Ginger                         1/2"
Garlic                          2 cloves
Dhania seeds               1.5 tsp
Cumin seeds               1 tsp
Fenugreek                   1/4 tsp

Method:
  • On a heavy skillet, toast all the whole spices listed under the 'Masala Paste' till fragrant. 
  • Combine the toasted spices and all the other ingredients for the Masala paste with some water and pulse till smooth.
  • Heat 2 tbsp oil in a pot. Throw in the mustard and the curry leaves. Once the cracking stops, pour in the Masala paste. Simmer till oil floats on top.
  • Once oil floats on top, pour in the sweet mango pulp, 1/2 cup of water. Bring it to a boil.
  • Toss in the shrimp/ panner/ tofu/ vegetables.Cover and simmer till it is done. 
  • Just before serving, heat the remaining oil in a pan. Throw in the fresh coriander, onion and green chillies.Saute till the onion is golden. Pour this over the simmering curry. bring it to one last boil and serve immediately with steamed rice.

Koli Saaru /Chicken Curry

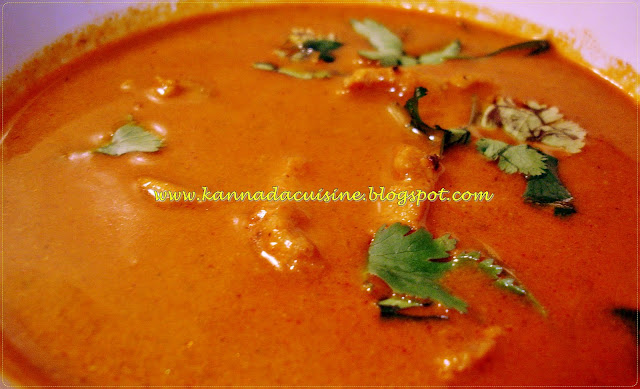
Susheela Aunty gave us this bowl of heavenly chicken curry that Honey demolished in minutes. It is a typical Gowda style curry that goes very well with Mudde . This recipe goes on to show that Karnataka has some very good non-vegetarian recipes to offer. Watch out for more such recipes...it is on the way.


We will need,

Chicken         1 lb cut into 1cubes
Peanut oil       3 tsp
Salt to taste

For the masala paste:
Garlic             3 cloves
Ginger            1" piece
Cloves           3
Cinnamon       1/2" piece
Poppy seeds   2 tbsp
Chilly powder  2-3 tsp or there about
Dhania powder 2 tsp
Coconut           1/4 cup grated
Onion               1 medium
Coriander fresh   a handful

Method:
  • Heat a pan. Toast the poppy seeds in the pan till fragrant. Remove from heat and crush coarsely. Set it aside.
  • In the same hot pan, toast chopped onion till golden in colour.
  • Combine the toasted onion, poppy seeds and all the other ingredients for the masala paste and grind till smooth.
  • Heat oil in a thick bottom pot. Drop the chicken cubes and brown the cubes on all sides.
  • Pour over the masala paste and enough water to cover the chicken very well. 
  • Cover and simmer till the chicken is cooked through and the masala is well cooked, about 30 minutes. 
  • Adjust salt. Chop and sprinkle some fresh coriander on top of the curry if desired.

Rave Unde

Rave unde is a simple and easily scalable sweet dish. We love it in our family. This recipe is courtesy Susheela aunty.
Actually Rave Unde reminds me of Maha Ekadashi, a festival that we are supposed to celebrate by fasting but most often than not we end up feasting. Typically my grandmother would make Chakkli, Kodbale, Nippattu, Kobari Mithai, Rave Unde and Karjikai and store it in huge tins! The entire family would gather for the festival and everything would disappear by the time we did all leave. Ah! how I like those days.


We will need,

Sooji/ Rava   1 Cup (Chiroti rave / or finer rava)
Sugar            1.5 Cup a little more or less ( Coarsely powdered or use the finer variety, preferably Boora sugar)
Ghee                            About 1/2 Cup or little more
Cashew and Raisins      1/2 Cup (more or less is fine)

Method:
  1. Heat about 1.4 cup of ghee in a Kadai.Throw in the cashews and Raisins. fry till golden, remove from heat and set it aside to cool.
  2. Heat the remaining Ghee and dump in the Rava, toast it on low flame till the sooji is fragrant. Keep tossing the Rava and make sure not to burn it. Remove from heat. Sprinkle a few tbsps of hot water on the rava and mix well. Stand it for a few minutes.
  3. While the Rava is still warm, mix in the sugar and the dry fruits and the ghee. Check for the sweetness. If you need it sweeter go ahead and add more sugar. 
  4. Grease your palms and press about 2 tbsp of the mixture into small balls. Set it up in a wire rack and when it is cooled and completely set, store it in air-tight jars. They last for weeks this way but will not :)

Ragi Sari

Introducing solids to little ones is a daunting task.. First time moms are especially confused! What to feed, when to feed, when to start, how to feed...etc. We need to figure out answers all by ourselves but then I can do my bit by posting the recipe for Ragi Sari the ragi gruel that is feed to babies back home. We have been feeding our little one Ragi Sari and he loves it...Go ahead and try it with your little one.


We will need to prepare the Ragi powder first and then make a gruel.

To Prepare the Ragi powder/flour,
  • Pick and clean Ragi. Wash it in multiple changes of water.
  • Soak it for about 6-8 in plenty of water.
  • Tie it in a cotton cloth and sit it in a warm place for it to sprout. 
  • Once it has sprouted takes about 24 to 48 hours depending on where you live and the season, spread it out on a cotton cloth in shade preferably indoors. 
  • Once the Ragi is completely dry, pulse it in a coffee grinder. The mixture should be coarse not fine. 
  • Then pass the broken Ragi on a Muslin sieve. Collect the fine Ragi dust store it for future use. I use half a kilo of Ragi for every batch. It does not store very well, not more than two months.
To prepare the Sari/Gruel.

Ragi Sari powder   1/2 tsp
Ghee                      1/4-1/2 tsp
Crushed jaggery      1/4 tsp
Water                     4 tbsp

Method:
  • Mix a tsp water with the Ragi powder and set it aside. 
  • Heat the remaining water and jaggery together and filter the water to remove any impurities in the jaggery.
  • Heat the filtered jaggery-water. Pour the Ragi powder mixture. Bring it to a boil and to a desired consistency. 
  • Stir in ghee at the last minutes. Remove from heat and allow it to cool down completely before feeding your baby. 
  • Increase the amount of Sari once you know your babies appetite.

Huggi /Seasoned rice gruel

My mother used to tell me a story about a destitute girl who prayed to lord Vishnu to help her ease the pangs of Hunger. Lord Vishnu appears before the girl and presents her an Akshayapatra that could produce Huggi on a particular command, stopping at another command. The girl is generous and kind and serves Huggi to needy. This triggers the neighbour's jealousy. The neighbour steals the Huggi Akshaypatra but does not care much about the commands. She commands it to start whence Huggi starts to overflow. But she does not know how to stop!!! Alas.. first the Huggi fills up her kitchen and then the whole house and then the village that she would have to be rescued by boat :) Then the actual owner of the Akshyapatra turns up, now knowing where exactly her Akshyapatra was and commands it to stop!

Yeah! when ever i make Huggi, eat Huggi, think of Huggi, I kinda of start imagining a girl in a boat rowing across a pool of Huggi! How funny. Who ever wrote the story. But then I love the story for precisely being funny!! Ah! Stories, I love them, much more if they have to do something with food.

Here is a simple Huggi recipe. Huggi is similar to Khichdi/Pongal. My baby son loves it. In fact we have been making Huggi more often than usual for this reason. It is indeed a great baby-friendly food. Try it with your young one.


Rice           1 Cup
Split Moong Dal    1/2 Cup
Water          9 Cups
Black pepper 1 tsp
Jeera               1.5 tsp
Ghee               2-3 tbsp
Curry Leaves      a handful
Green Chillies      4-5 (optional )
Coconut                3-4 tbsp grated (optional)
Mustard seeds      1/2 tsp
Turmeric     a generous pinch
Hing a dash

Method :
  1. Wash rice and moong dal in several changes of water, combine it with 9 cups of water in a pressure cooker and cook till done, about 2 whistles.Set it aside to cool.
  2. Crush pepper and Jeera roughly till the pepper breaks down into two pieces and not more; set it aside.
  3. Once the rice mixture is cool, Heat ghee in a pan throw in the Mustard seeds, hing, curry leaves, pepper, jeera, turmeric saute till fragrant. If using coconut and green chillies, throw them in now. Saute till fragrant. Turn off the heat. 
  4. Pour the mixture over the cooked rice and dal. Mix well. Bring it to a simmer and adjust salt. Serve immediately.
If serving a young one, avoid chillies and use whole pepper instead of pounded pepper.

Huli Anna /Tamrind Rice

Hulianna is Pulioggare's lesser known cousin. One of the rice dishes that are destined to be lunch-box-hits!
I make a big batch, leave it in the refrigerator. Heating up each serving as I pack Honey's lunch box.


We will need,

Rice                       2 cups cooked and cooled
Tamarind                   size of a lemon (Soaked in warm water for 15-20 minutes)
Huli Pudi /Sambar Powder    1.5 tsp
Jaggery                  1.5 tbsp (crushed, more or less depending on taste)
Peanut Oil              3 tbsp
Green Chillies        2-3 slit
Mustard            1/4 tsp
Hing                   a dash
Onion               1 medium chopped (Optional)
Curry leaves      a hand full
Peanuts              a hand full
Salt to taste

Method:
  • Squeeze and extract as much pulp from the tamarind. Discard the fibers.
  • Combine the pulp, Huli pudi, jaggery in a thick bottomed pot. Cook till the mixture smells fragrant, about 20 minutes. Set it aside
  • In another pan, heat oil. Toss in the mustard seeds, hing, curry leaves, green chillies, onion and peanuts one after the other. Cook till peanuts are toasted. Set it aside.
  • To assemble, stir in the cooked tamarind into the rice, a teaspoon at a time. Check the taste and stop mixing once the desired taste is achieved. I like it with a lot of tamarind, MIL likes with just a hint!! So play with it...Adjust salt.
  • Finally mix in the onion- peanut takda with the rice and enjoy...

Peanut Chutney

Though it is not quite a native species groundnuts aka peanuts have been something my ancestors relished!! It has a cultivation history of least 150 years in the old Mysore region. Primarily an oil seed, it was also converted into favorite condiment like chutney.

In my kitchen, it is the most accepted and adored Chutney. We like its versatility, taste and the ease with which it ends on the dining table. We eat it with Idli, dosa, Akki rotti, Ragi rotti and plain rice...Could it be better? try it with bread!

They say the way to a man's heart is through his stomach. If it my Father-in-law's heart, it is through Peanut Chutney..I discovered it very early on. When ever MIL was out of town and I had an opportunity to cook I would ask FIL about his lunch preference. He did say 'Kadalebeeja Chutney madbudamma' / Please repare some peanut chutney'... It happened a few times to make me feel that he was just being considerate and did not want me to dish out elaborate meals. Considerate he was, but MIL later told me it was his preference as well! So folks, try this one and let me know..

We will need,

Peanuts/ Groundnuts      1/2 Cup
Red Chillies                   4-5 ( Byadigi ) Adjust according to taste
Garlic                            1 small clove
Tamarind                       1/2"strip
Curry leaves                   a handful
Coriander fresh               a handful
Salt to taste

Method:
  • Heat a skillet. Toast the peanuts till fragrant about 5-8 minutes. Remove and set it aside to cool.
  • In the same skillet, toast the red chillies for about 3-4 minutes till fragrant, remove and cool.
  • Turn off the skillet and throw in the curry leaves. Toast it on the hot skillet. Remove and cool.
  • Combine all the toasted ingredients and the rest of the ingredients in a blender, add a little water and pulse till almost smooth. 
  • Remove and serve it with Idlis, rice...

See/ Sweet Chutney

Idlis are traditionally served with savory chutney, peanut, coconut etc. But we also relish it with sweet coconut chutney. It is my grand mother's specialty. My grand father is a very big fan of this chutney, so am I. It is pretty easy to whip up and makes a breakfast hearty and festive.

We will need,

Roasted Channa Dal / Kadale Pappu    1/4 Cup
Shredded Coconut                                1 Cup
Jaggery                                                  1/2 Cup or so Adjust according to taste
Cardamon                                             1

Method :
  • Combine everything in a blender with very little water and pulse till smooth. Serve with Idlis .

Idli

Fermentation is very whimsical here in the US..How hard did i try to make the perfect Idlis that smells so much like home, just as soft, as pillowy...just as heavenly..It did take me quite a while, but now I guess I am in Idli heaven. The secret, ELGI Ultra Wet Grinder my MIL got me from India this summer..The timing could not have been better, as I call spring/Summer - "Idli Season". During this period, the whimsical fermentation turns less temperamental and more predictable.

The other Idli recipe I have here on this blog is made from Idli-rawa, which essentially means the resulting Idlis are kinda second grade, not the best quality that can be called "premium grade A"!!!!The best of idli is always the from the scratch rice idlis. In fact the 'Idli rice' is supposed to yield excellent result. However I figured out that using the Carolina long grain rice yields good quality Idlis as well. Try a few varieties before you know your Idli!! Chances are that you will start appreciating Carolina long grain rice much better. In fact Arborio rice makes good Idlis as well, for those of you who's Risotto plans went sour. Try making Idlis with the Arborio rice that makes you feel guilty every time you reach out for the pantry door.
I have fallen in love with Carolina long grain rice for it takes only about a fourth of soaking time than the traditional Indian Idli rice. Again the choice is yours.
After having these Idlis for breakfast the other Wednesday, I drifted away to a time that would never come back...Lounging on the Mango trees in my late Grandfather's grove. It was like summer vacation all over again, at a time when vacations did not mean coming back home with a suitcase full of dirty clothes crying to be laundered; Vacations meant, sun, summer, mangoes, jack fruits, Grandparents, cousins, aunts, uncles,water-from-the-pumpset, delightful aromas from Granny's kitchen, unlimited Idlis, Dosas, Pooris, a hearty appetite, a vocabulary sans words like 'diet' 'weight' 'watch' 'inches' 'kilos' 'pounds'......Ha!

Here we go again...

Idlis...

We will need,

Idli Rice     1 cups
Carolina Rice/ Sona Masuri 2 cups
Urad Dal   1 cup
Beaten rice /Avalakki/Poha 1/2 Cup
Fenugreek    1 tsp
Kosher salt   2 tsp
Channa Dal   2 tbsp

Method:
  • Soak all the ingredients except salt separately overnight.
  • Grind separately the dals and the rice adding as little water as possible. Try using the soaking liquid instead of water. Mix well. Stir in the salt. Sit it in a warm place, say a warm oven for at least 8-10 hours to ferment. The mixture is ready to be used when it is almost double in volume.
  • When the batter is ready, grease Idli moulds. Set a steamer or a pressure cooker with about 2 inches of water. 
  • Without stirring the batter, gently scoop a ladle full of batter and pour it on to the Idli moulds. The idea is to retain as much aeration as possible. Steam for 10-14 minutes till the idlis are firm and done.
  • Rest the idlis in the mould for a few minutes, Scoop them out and serve then with sweet chutney, peanut chutney and Sambar just like my Ajji / grandmother would.

Balida Rotti

Balida rotti literally means spread-flat bread! There is just so much to it, but the simplicity is what makes it so difficult.. I am yet to master the art of spreading the dough on a hot griddle. These are fat free and super healthy and is worth every effort it takes...Recipe courtesy : Aunty Susheela


We will need

Ragi flour  1 cup
Salt
Onions   1 medium minced
Water

Method:
  • Mix ragi flour, salt to taste, onions with enough water to make a very soft chapati dough. The dough should be very soft, very pliable, say the consistency of peanut butter. It should not fall from the back of the spoon though.
  • Heat a light weight griddle. When it is hot, take a lemon sized ball of dough and place it on the tawa . 
  • Using your fingers, spread the dough all over the tawa, giving it a shape of roti.
  • Cover and cook for a few minutes.
  • Remove from the tawa and serve hot with some peanut chutney and ghee/butter.

Aunty Susheela's Motte Pulav /Egg Pulav

My blog is skewed disproportionately toward vegetarian fare till date. This is not intentional, just that Kannadigas are very vegetarian-friendly folks! Historically speaking, we are a creed who experienced strong religious stimulus endorsing vegetarian way of life! In the ancient period it was the Jain monks... Jains are so rigid in their practice of vegetarianism that they do not eat meals after sunset lest they consume the fly that accidentally fell in their meal by the light of earthen lamp! They also refrain from eating vegetables, if the plants growing then has been harmed while harvest of the vegetable, like root vegetables. The contribution of Jain poets to Kannada literature is also widely recorded. One epic in old Kannada revolves around the ill-fate of a King spanning several births for killing an animal.
In the 11th century Ramanujacharya fled the religious persecution in the hands of Cholas to  Melukote in Karnataka bringing with him his brand of vegetarianism. That is why 'Ranganatha'- temples dedicated to lord Vishnu is so common in the the old-Mysore region!
In the 12th century it was Basavanna. His influence swept through wide swaths of from north to south. He recommended a softer brand of vegetarianism and roots vegetables were  very welcome. In later centuries, it was Madhwacharya and Ramanujacharya.
Our erstwhile Maharaja of Mysore were also strict vegetarians and indirectly endorsing Vegetarianism. No wonder 15-20 years ago to restaurants serving non-vegetarian food were very hard to come by.
This does not mean we do not have a talent to cook up great tasting non-vegetarian fare!! People from Coorg, Chikmagalur / Malanadu region are famous for their game-meats dishes. Coastal Kannadigas prepare excellent sea-food.. reserving these schools for later. I have asked my sister to source some Coogi recipes from her MIL for me.. Yes she is married to a wonderful Coorgi..

For now it is Gowda-style recipe series courtesy aunty Susheela, our delightful neighbour.

We will need,

Rice                   2 cups  washed and cleaned
Eggs                   4
Onions               2 medium chopped

Garlic                 4-cloves
Ginger                1"
Cloves                6
Cinnamon           1"
Coriander           a handful
Red Chilly Powder 2 tsp
Dhania powder       2.5 tsp
Peanut oil             3-4 tbsp
Salt 
 
Method:
  • Wash clean rice in several changes of water and soak it in clean water. set it aside
  • Grind together ginger, garlic, cinnamon, cloves, chilly powder and dhania. set it aside.
  • Heat oil in a thick bottomed pot. Toss in chopped onion. Saute till onion is golden. Pour the ground masala and cook till the oil floats on the top, about 8- 10 minutes.
  • Push the masala to the side and break eggs one after the other into the center of the pot, scrambling the eggs. Once the eggs are set, stir in the masala. Cook the eggs thoroughly. 
  • Add about 3-4 cups of water. (3 if using Basmati, 4 if using other varieties). Adjust salt. 
  • Once the water comes up to a boil, add the soaked rice. Cover and cook till rice is done. Throw in the coriander.
  • Serve hot with lemon wedges and hard boiled eggs

Togaribele Dose / Toor Dal Dosa

Recently we moved from Connecticut to New Jersey. My belly has been more than happy ever since. So many varieties of Indian restaurants, Karnataka-styled Hoysala to Indo-China styled Nanking! I could not believe there was such a big Indian community to support all these restaurants. In fact there is! The coolest part of our new residence is our Kannadiga neighbour. Aunty Susheela, is a lady of charm and a repertory of fabulous recipes. She pampered us with good food all these days. It is sad that she will be leaving to India but will return next summer. She has taught me some mouth-watering Gowda-styled food. The gowda community is famous for its non-vegetarian offering. So watch out meat-lovers out there, there will be quite a few recipes coming up!!!
But for now one of Aunty Susheela's recipe, the toor dal dosa. It was a super hit!My MIL got me a new ELGI Ultra Grinder and I am a happy lark making Dosa, Idlis every other day :)

We will need,

Toor Dal/ Split Pigeon peas/ Togari bele  1 Cup
Rice                                                        2 Cups
Red Chillies (Byadige)                             4
Ginger                                                     1 " piece
Jeera/Cumin                                            1/2 tsp
Dhania/ Coriander seeds                          1/2 tsp
Salt
Oil /butter/Ghee

Method
  1. Pick and clean the dal. Wash dal and rice separately in several changes of water.
  2. Soak the dal and rice separately in water for at least six hours.
  3. Toast the red chillies, Jeera and Dhaniya on a hot griddle till fragrant.
  4. Grind the soaked dal, rice and spices into a smooth paste adding as little water as possible. Use the soaking liquid if necessary.
  5. Mix in salt and set it aside in a draft free place to ferment overnight. In the Eastern coast of USA, i preheat the oven, turn it off and set the batter in the oven overnight. The batter doubles in volume after fermentation. 
  6. To make dosa, pre-heat a skillet. Ladle about 3/4 cup of batter to the center of the pan. Spread it out evenly using a circular motion from the center of the batter reaching out to the edges. Pour a tablespoon of peanut oil /Ghee on the dosa. Cover and cook for a few minutes till the bottom of the dosa is golden brown.
  7. Flip the dosa and cook for a couple of minutes. Remove from heat and serve with chutney or Saagu

Shavige Pulao

My MIL is with us these days. She is getting to know her brand new grandson and I am getting to know some of her delightful signature dishes. I am having the time of the world, getting to eat everything. Since I am out of the post-partum diet (more or less, still slightly hesitant about cabbage family and such stuff), I am eating everything she prepares. Of course all the love makes it extra-special.
Here is one of her signature recipes... Shavige pulao, it is vermicelli replacing rice in Pulao. It is hard to explain how good it is. Besides it takes about 30 minutes to make, what better than such a dish for a quick breakfast, or say a week end brunch??

We will need,

Vermicelli / Shavige   3 Cups
Mixed Vegetables      1.5 Cups
Ghee                          2 tbsp
Oil                             2 tbsp (MIL's original recipe calls for 4 tbsp)

Grind,
Onion                         1/2 big
Pudina/ Mint                1/4 C
Coriander                    1/4 C
Green Chillies               4
Ginger                         1/2"
Garlic                         2 cloves
Cloves                        3
Cinnamon                   1/4"
Turmeric                      1/2 tsp
Dhania  powder           2 tsp

Method
  • Toast vermicelli in one tbsp of Ghee. Set it aside.
  • Combine all the ingredients under "grind" in a blender. Pulse till mixture is smooth.
  • Heat the remaining oil and ghee in a wide bottom pan. Tip in the vegetables, saute till cooked half way through. 
  • Add the ground mixture. Cook till the spices are fragrant. About 10 -15 minutes.
  • Add 4.5 cups of water to the simmering spices. Bring it to a slow boil. 
  • Dump the vermicelli, stir and cover. Cook till done. Serve with some raita on the side.

Chilli Egg

Dhabhas are a must-try food joints back home. As I remember, most restaurants in the city-centers in smaller towns of Karnataka (i.e. most cities apart from Bangalore and Mysore) had very few places serving non-vegetarian meals. There used to be something called 'Hindu Millitary Hotel' (HMH). These  eateries were the exact contrast to 'Bramhanara Upahara Mandira'. HMH served traditional meat dishes. I am not sure what all dishes are common in their menu, for I have never been to one. And then there were Dhabas on the outskirt of the cities. The best part about these Dhabas were the anonymity and stigma-free non-vegetarian food for those who are not supposed to eat meats! Besides being affordable Dhabas were the eatery of choice for young people with not-much-money-to-spend like students!!
I have had my fair share of Dhaba on Tumkur Road, Mysore Road....Wonder if there still are any left. They do serve amazing food...hot rotis, naans straight out of the oven and of course stuff like Tomato masala, Dal fry, Capsicum masala, Kofta curries.. I am drooling even as I type!!
I have not been to a Dhaba in quite some time. But my sister had the opportunity of visiting one and she came back with a new recipe..Egg Chilli. I tried it and it was tasty.

We will need,

Hard Boiled Eggs  4 cut into half
Red Onion   1 small chopped
Ginger Paste   1/4 tsp
Garlic Paste 1/4 tsp
Green Chillies  2 chopped
Green Coriander chopped
Corn Starch  2 tsp
Salt  to taste
Soya Sauce to taste
Peanut Oil    3-4 tbsp

Method:
  • Toss the eggs with some salt , soya sauce and corn starch. 
  • Heat 2-3 tbsp oil in a pan and pan-fry the eggs till golden in colour. Remove and drain it on a paper towel
  • Heat the remaining oil in a pan. Drop the onion, garlic and ginger, saute for a few minutes.
  • Toss in the green chillies and then the fried eggs. Toss well.
  • Splash in some Soya sauce and fresh coriander. And serve immediately.
If preferred, the eggs can be deep fried as well. I bet it will taste better..

Kumbalakai Palya

The Yellow Indian Pumpkins are one of those vegetables that grows like weeds back home in Karnataka. There was a time when most of our backyards had at least one Pumpkin creeper that we would scoff at the idea of having to buy them in the market. My grandmother probably would still not agree with the idea of buying pumpkins!! It used to so happen that these giant vegetables were just too much to be used up for a meal or two. Therefore sharing was the name of the game. If we had a Pumpkin in our creeper today then the entire block would be cooking Pumpkin. Same if our neighbour harvested Pumpkin from their backyard the next week. Food was all about sharing right. Now towns like Bangalore and Mysore have grown beyond recognition. As far as me, I am still in the time shell that was my childhood, when air at this time of the year was permeated with the aromas of Mangoes and Jackfruits not burnt out gasoline!!! None of my family members have a back yard these days. My grandparents got their backyard paved with concrete because there was not enough sunlight in the backyard, (thanks to the matchbox-over-matchbox concrete construction around their home in Bangalore!!) and nothing would grow there anymore. It is now my dream to have a large backyard and all sort of fresh vegetables flourishing there.
Coming back to Pumpkins, we did not get these in the Indian stores when we lived in Connecticut. But here in New Jersey, it is different. We get all sort of vegetables. I only hope we do end up getting raw Jackfruit and plenty of Indian mangoes...

We will need,

Yellow Pumpkin          1 lb cubed
Coconut                      3 tbsp (yes be generous)
Green Chillies               6-7
Peanut Oil                    1 tbsp
Mustard Seeds             1/2 tsp
Hing                             a dash
Cumin Seeds                1/2 tsp
Curry Leaves                a handful
Salt

Method:
  • Heat oil in a Wok. Toss in the Mustard, Cumin, Hing and curry leaves.
  • Once they crackle, drop the slit green chillies. Once they pop, drop in the cubed pumpkin and coconut.
  • Sprinkle a scant 1/4 cup of water, cover and cook till the pumpkin is soft. They cook pretty fast. So keep a close eye on them. Adjust Salt.
  • Serve them with Akki Rotti. 

    Akki Rotti / Rice Roti

    One of the most popular breakfasts back home is Akki Rotti, more so during winters when 'Avarekai'/Papdi Lilva aka flat beans crowd the markets. We consume tonnes and tonnes of Avarekai Usuli with innumerable Akki rottis each season. Even as I write this post, the tantalizing aroma of Usli whiffs the air around me, though it is well past winters...So much is my connection with Akki rotti-Usli. In fact we used to bring Avarekai in the multiples of 2.5 kilograms called 'Tuka', sometimes running upto to 5-6 tuka for the week. But this is post is much about Rotti than Usli so lets get on with the Akki Rotti. During the rest of the year we pair these Rottis with Ennegai, Kumbalakai Palya and Assorted Chutney. Well this rotti is pretty versatile for it is very mild tasting with a hint of sweetness of cooked rice and goes well will pretty much everything. My sister's MIL who is a Coorgi serves it with 'Pandi Curry' or Pork Curry. So let imagination rule and enjoy the Akki Rotti.

    Needless to say, mom excels in this dish. In fact she makes much better Akki rotti than her mother, who usually sets my ultimate food benchmarks!! Congratulations mom, when it comes to Akki Rotti, you win. Sorry Ammaji (my grandmother) this time you loose :(


    Serves 6 ||  Calories per serving (Kcl) | total 127 | Protein 2 |  fat 2.2 || Fiber 0 gm |

    Rice Flour       1.5 cups + extra for rolling.
    Salt  a pinch
    Water
    Ghee or peanut oil as desired

    Method:
    • Bring a cup and a half of water to boil. Dump in a generous pinch of salt.
    • Reduce heat and stir in the rice flour, a tablespoon at a time. Making sure there are no lumps.
    • Cover and turn of the heat.
    • When the mixture is cool enough to handle, kneed it into a dough akin to the chapati dough. If the dough is very tight, sprinkle some hot water. If it is too runny, mix in a handful of rice flour.
    • Pinch a ball as big as probably a golf ball or may be a little larger.
    • Roll it between the two of your palms making it perfect sphere. Flatten it slightly and place it on a floured board. 
    • Roll it out into circular discs using a rolling pin. 
    • Place it on a preheated tawa. Cook on one side, sprinkle some water, turn it and cook it on the other side as well. Apply oil or ghee if desired. If I am eating, it is Ghee please :)
    • Serve with Ennegai

    Menasina Saaru

    It is again cloudy and raining. It is so boring a day that I hardly feel like cooking anything. On such days we dish up some Menasina saaru, something that warms me up from within as well as takes just over a few minutes to cook. This is again one of the first foods that a new mother is served. It is also a tonic that does a world of good to a runny nose and a sore throat, a South Indian equivalent of 'chicken-soup-for-the-soul'.


    We will need,

    Tamarind soaked in warm water size of a medum lime
    Jaggery crushed 1 heaping tsp
    Pepper 1 tsp crushed
    Jeera 1 tsp crushed
    Garlic 3 cloves crushed
    Ghee 1 tbsp
    Curry leaves a handful
    Dry red Chillies 3-4
    Mustard seeds 1/2 tsp
    Hing a dash
    Coriander fresh a handful chopped
    Salt

    Method:
    • Squeeze the tamarind pulp and add water making it about 3 cups or so. The water should be tangy but not too sharp on the tongue.
    • Add the jaggery to the tamarind water and bring it to a boil
    • Meantime prepare the 'oggarane'. Heat ghee in a small wok. Drop the Mustard seeds, Hing, Curry leaves, Pepper, Jeera, Garlic and  the dry red chilies. Once the mixture is fragrant, turn off the heat.
    • Pour the 'oggarane' over the tamarind water and adjust salt. The saaru should have a pleasant balance of spice, sweet and tang. Bring it to a quick boil and serve piping hot.

    Bread Uppitu

    Bread uppittu is a variety of upma made using stale bread. We so much love it that we end buying bread to make it instead of using stale bread :). But I should mention that the Upma turns out better if the bread used is at least a couple of days old and kinda holds it shape. Also the best variety of bread will be the sweetish Iyengar bakery style bread. We do not get it often here, so I use 'Whole wheat white' bread. Ya! I know it is no where close to the Iyengar bakery bread, but then got to do with it.


    We will need,

    Bread        1 loaf cubed. (Trim edges if you like)

    Peanut oil     1 tbsp
    Channa Dal   1 tsp
    Urad Dal       1 tsp
    Peanut           2 tbsp (optional)
    Jeera             1/4 tsp
    Mustard         1/4 tsp
    Curry leaves   a handful
    Lemon juice   1 tsp
    Hing                a dash
    Turmeric         a pinch
    Green Chillies  4-5 adjust according to taste
    Onion            1 medium chopped
    Salt

    Method
    • Heat oil in a wok. Toss the mustard, Hing, jeera, Curry leaves, Channa dal, Urad dal one of the other.
    • Toss in the green chillies, turmeric and the peanut. Stir for a few minutes.
    • Tip in the chopped onion. Saute till golden. Add Salt and drop the bread cubes. Toss well to coat the bread pieces with the onion mixture.
    • Squeeze the lemon juice over the bread and mix well. 
    • Serve warm or room temperature.
    We love it as a quick breakfast or an evening snack.

    Bendekayi Paccadi/ Okra raita

    It is raining bendekai here!!! Got to post this one. It has been lying in my folder for god-knows-how-long. So no banter, no nonsense, lets head straight to the recipe.


    We will need,

    Okra/ Bendakai   1/2 lb
    Yogurt                 1 cup
    Peanut oil            1 tbsp
    Green chillies        4-5 slit, adjust according to taste
    Mustard seeds      1/2 tsp
    Channa Dal          1 tsp
    Urad Dal              1 tsp
    Hing                     a dash
    Curry leaves         a handful
    Salt                      to taste

    Method
    • Dice the okra and toast it on a hot griddle till the edges char. 
    • Heat oil in a wok. Toss in the Mustard seeds, once they splutter, toss in the urad dal, channa dal, hing, curry leaves and green chillies. 
    • Once the sizzling stops, toss in the toasted okras. Mix well. Add salt and set it aside to cool.
    • Beat the yogurt well. Once the okra mixture is warm, pour in the beaten yogurt. Adjust salt.
    • Serve immediately at room temperature with Tovve or dal and Rice.

    Bendekayi Chutney/ Okra Chutney

    My love for Okras is legendary. Keep searching for new ways to eat them. Pushing mom for those forgotten recipes, came across this recipe. Mom made it after a long time and it was a super hit. I have been making it regularly these days.


    We will need,

    Okra/ Bendekai/ lady's finger 1 lb
    Green Chillies 6 -10 adjust according to taste
    Tamarind extract 1 tsp
    Garlic 3 cloves
    Curry leaves a handful
    fresh Coriander a handful
    Mustard 1/4 tsp
    Peanut Oil 1 tbsp
    Salt

    Method:
    • Clean Okras and wipe it dry, any water on them makes them a lot more slimy. Dice them and toast them on a hot skillet till the edges char. Set them aside.
    • Heat oil in a pan, drop the mustard seeds, curry leaves and the crushed garlic. Once the spluttering stops, toss in slit green chillies. Saute.
    • Add the okras and toss. Remove from heat.
    • Once the mixture is slightly cool, pile the okra mixture and the remaining ingredients in a food processor and pulse. Better yet, pile everything into a mortar-pestle and pound it till well mixed and coarse.
    • Serve with hot rice and lots of ghee.

    Hesarubele Chuntey / Moong dal chutney

    Moong dal is one of the oldest and most trusted foods in our part of the world. It is an approved food for new mothers, babies, senior citizens, those with weak digestion etc.  I have always loved it. One of my favorite ways to eat it is in the form of chutney. The recipe reflects the simplicity of ancient lifestyle. They needed no Microwave, no oven, nothing. They could accomplish the task of making this chutney with a simple stove and a mortar-pestle.


    We will need,

    Moong Dal 1/2 cup
    Dried Red Chillies  5-10 Adjust according to preference
    Tamarind pulp 1/2 tsp
    Garlic 2 cloves
    Curry Leaves 10-15
    Coriander leaves a handful
    Salt to taste
    Coconut 2 tbsp

    Method:

    • Toast the dal till fragrant and golden brown in colour. Set aside.
    • Toast the chillies till fragrant and set it aside. 
    • Combine everything in a blender and pulse with a little water till smooth. The texture should not too fine. It goes well with Rice, Ragi mudde, Rotis.

    Herekai Bajji/ Ridged gourd Curry

    Ridged gourd grows on a climber. It used to very common to have one in the backyard or sometimes on the compound wall /fence! So this is one go-to vegetable we are so used to back home. Just pluck a few gourds here and there bingo you have a wonderful curry ready in minutes. This is one of those made-in-minutes rustic curries. We love it for its complexity of flavours and simplicity of ingredients. Thanks mom again for yet another old-world-long-forgotten recipe.


    We will need,

    Ridged Gourd                            1 cubed
    Eggplant/ Bringal (Indian, small)  2 cubed
    Green Tomatoes                         2 chopped
    Grey Squash         (Optional)      2 chopped
    Garlic                                         4-5 cloves
    Green Chillies                              4-5 (adjust according to taste)
    Fresh Coconut                            3 tbsp
    Turmeric                                      a pinch
    Butter                                          1 tbsp
    Mustard seeds                              1/2 tsp
    Curry leaves                                 a Handful

    Method:
    • Combine all the vegetables, turmeric and coconut in a pressure cooker or a large pot and cook till done. Simmer.
    • Heat 1/4 tbsp butter in a pan. Toss in the mustard seeds and curry leaves.
    • Once they crackle, pour it over the cooked vegetable mixture. Stir in the remaining butter and serve with Ragi Mudde. 
    Actually the original recipe calls for no "oggarane" or the Mustard tempering. But then I cannot finish a dish without the "oggarane"! 

      Mysore Pak/ Chickpea Fudge

      The sweet equivalent of Bisibelebath is probably Mysore Pak. Nothing represents ‘Karnataka’ better than Mysore pak after all the dish carries our Cultural Capital in its very name. The other day I was really amused when I noticed somebody writing about Mysore pak that it is originally from AP! Quite did not know Mysore was in AP. Oh! yes it is official, the dish was invented in the Mysore palace kitchens.

      The legend is that the Mysore Maharajas were very fond of this particular sweet. “Guru Sweet Mart” in Mysore is still was once upon a time  the Mecca of Mysore pak and used to supply the sweetmeat to the palace as well. Recent reviews are not as favorable though. "Guru Sweet Mart" you still rule!!!I have still struck to “Guru Sweet”… I still make it a point to grab their Mysore Pak when ever I am in the city. When in Bangalore I buy Mysore Pak from ‘Sri Krishna Sweets’ Malleshwaram or ‘Venkateshwara Sweets’ Chickpet (Could be Balepet as well, very close to Upparpet Police Station). Sorry  Sri Krishna Sweets, Sorry Venkateshwara Sweets and Sorry Tazza Mithai, you all loose, It is still "Guru Sweet Mart" all the way. Look at this piece of Manna from  the heaven. No fancy packing, only pure ghee and unbeatable taste. I am sure they do 1:5 Gramflour: Ghee and the mild cardamon flavour the just hoovers around in the background.Oh boy! I love it.


      Mysore Pak is a delicate dessert. The consistency should be that which melts in your mouth in seconds and it should be so rich that you cannot go for seconds. But you find plenty of inferior versions, some that are as hard as Peppermint candies! Do not skimp on Ghee if you desire velvety smooth Mysore pak. Stay clear from Vanaspati or oil. Also, good Mysore pak should have very few hole. The ones that have holes would have been made commercially, more out of economic considerations than love! therefore, less rich but more in quantity and do not rank high in terms of quality. Unfortunately in the case of Mysore pak, inferior imitations seem to be more popular than the original!!

      During our long life in Mysore, mom used to make it very frequently. Of late she had stopped making it because of health considerations. None of us are as young and none of us can justify such pleasures anymore.. Back then things were different. Our butter vendor used to visit us for fortnightly butter deliveries. The resulting ghee was too much for the four of us to finish. So the day before the appointed butter delivery, mom used to make Mysore Pak to use up the remaining ghee to make way for fresh ghee the next day :) What a plan. She used to alternate Mysore pak and Cake. So effectively, we got to eat Mysore Pak a week or so every month. Back then we were still not into 'stealing' from the racks and dabbas, so it indeed did last may be a week or so. Here is the amazing Mysore pak.


      Serves 20
      Per serving: 407 calories: Protein 1.3 g: fat 33.28: Fiber 0.65

      Chickpea flour/ kadale hittu/ Besan 1Cup
      Sugar 2 Cups
      Ghee 2 ½ to 3 cups


      Method:
      • Take a tbsp of Ghee in a skillet and toast the Besan till fragrant. Set it aside.
      • Grease a tray. Set it aside.
      • Melt ghee and set it by the stove. Keep ghee and Besan handy.
      • In a thick bottom pan combine sugar and a scant ¼ cup of water. Dissolve the Sugar and  bring it to ‘one thread consistency’. i.e. when you pinch the syrup between your wet thumb and forefinger you should see a single thread running between them.
      • Reduce heat to low. Sprinkle a tbsp of besan and a little ghee on the syrup and mix well making sure there are no lumps. Be careful, the mixture splutters and potentially scald. Repeat till all the ghee and besan are used up.
      • Keep stirring till the mixture leaves sides and lumps together into a big porous ball. Pour onto the greased tray and let it cool. Cut it into desired shapes and serve. Generally the sweet is generous in serving. But I cut them into 1”*1”*1/2” for our lifestyle justifies just as much!! Enjoy.
      Again to get authentic Mysore Pak, never skimp on the Ghee. Pure home made Ghee will give the best results.